I have a few neighbors that are incredibly creative and work on truly stellar projects. From time to time I get to help out with a few of those projects. This is one of those projects.
One of my neighbors wanted to make a floating retractable staircase/drawbridge. This was a bigger project that he planned / gathered materials for and worked on, off-and-on over a couple years. A handful of times he showed up with various pieces of material, plate and structural steel to CAD up and cut on the AVIDcnc plasma table. Some parts came along with an oral description of what shape he wanted and other parts came with cardboard cutouts to describe the shape.
Because some of this work had to be designed around existing materials saved from scrap bins over the years, there were a good number of layout steps to check / re-check along the way. It isn’t like we were going to just go replace 1&1/4 braided stainless steel cable with these kinds of end buckle terminations installed. ![]()

Some of these parts we nested together a bit to fit the various small ends and pieces of steel we had available to us. This material was recycled out of an old assembly. We had to take an angle grinder to get though the paint to ensure ohmic touch off in a few places. The dual laser line generator / cross hair system allows one to dry-run and ensure everything is going to fit, or drive right down, just inside the edge of a piece of steel.


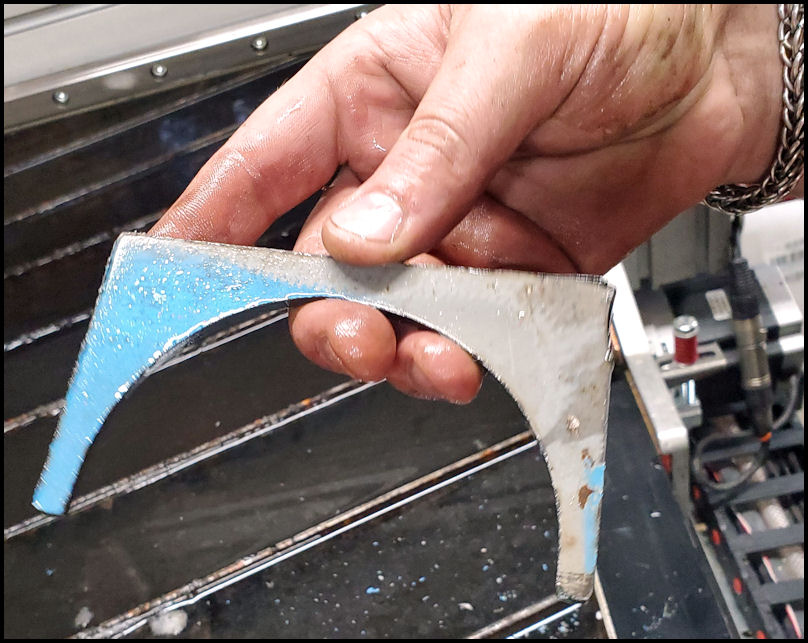
These parts are 3/16in thick. I’ve cut slits into material that I needed to bend around an odd sized curve on a few different projects. It works pretty well and can add an interesting visual dynamic, or the slits can easily be welded up afterward. In this case we went with over-sized slits for the look.


There were quite a few piece parts that all had to be cut out and we got our money’s worth out of that old scrap steel using every last bit. After that, an equally big piece of the project, the parts had to be cleaned up for welding and since these will end up being structural / load bearing welds in may places, proper bevels and fully welding out was required.


After a bunch of prep and getting things dialed in just so, it was time to weld. My neighbor had his 76 year old father over one evening while we were working and he wanted to take the synergistic mode on my MIG welder for a test drive. Oh wow can that man ever lay in a quality bead!


And then back to the AVIDcnc for more parts…


I am always impressed with the edge finish on 3/16in and 1/4in mild steel plate.

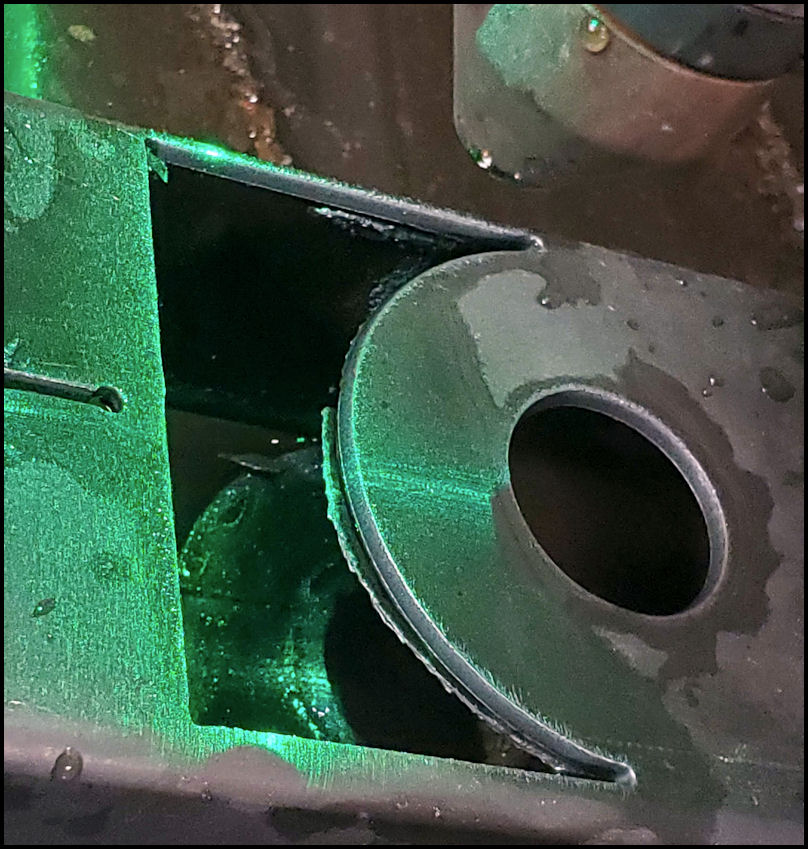
The remainder of the welding took place over in my neighbor’s garage on follow-on weekends. In the image below, you can see these pieces cut from the plate above have been beveled and fully welded out and then ground back for cosmetics. In this case the parent material is a 2" x 4" box tube.

We also had those box-tubes up on the plasma table. We had to set up a table-saw out-feed roller in the drive way and cut with the end of the material hanging out of the garage door due to the length of some of these pieces.
We had several ends on longer pieces and a few short pieces to do and we needed to cut both top/bottom on them in a way that was easy to line up/repeat. Rather than re-dialing things in to get them to line up over and over, I just threw a couple of the FireBall Tools mega-squares up on to the water table and used these as the datums against which to set the structural steel. Amongst all the longer pieces, there is also a pair of shorter “link-bars” that were cut this way as well.


After this, the material gets split with an angle grinder, hammered over, heavily beveled, welded out fully, and ground back giving a finish look like the following. My neighbor is just top notch with his fabrication skills, and he did all of this part of the grinding and welding over in his garage.

There was quite a bit more I am not capturing here but this gives a good feel for it…
Somewhere later in fall when the soaking rains had set in for a spell, my neighbor and another neighbor dug out a volume of 1.5Cu-Yd back in under his deck. They drove heavy coated rebar into the ground underneath it and tied it into a propper re-bar cage. They erected forms down in the excavated volume and poured a full weight fixed counterbalance to ensure this thing is going to be rock solid. That was a huge project unto itself and all you can see now that it is finished is the small pedestal above the ground that the entire stairway mounts to.
At the top of the stairs, there is a floating link that connects to the 2x larger tapered wheels that ride up and down in the C-channel. That link is a few degrees over center, so while the stairs are in the down position they are solid. The design is very well balanced so that one can grab the bottom step and easily swing it up and the whole staircase pivots and retracts to store vertically agains the deck.
It is hard to see in the photos, but in the extended position the bottom stair floads just a few inches above the ground.


One of the last pieces of the project is to fabricate and install the tread plates for the stairs. That hadn’t been done at the time these photos were taken.
It is just so cool to get to see and be a part of some of the projects that others like my neighbor dream up. This one was a lot of fun for me with my neighbor doing all the design and hard fabrication parts. He really pulled this off! ![]()
-Kenneth