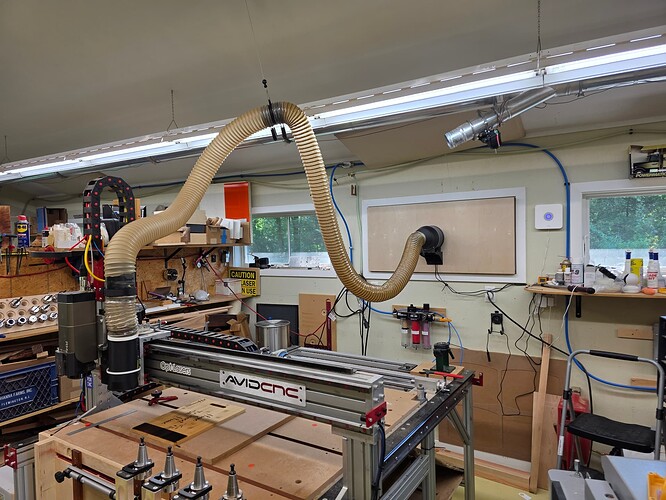
I laser engrave a lot of cutting boards. Until a week ago, I just opened all the windows in my shop and turned on my air cleaners, but the shop was mostly uninhabitable while I’d engrave large batches of boards.
As I thought about a fume mitigation strategy, I had several questions I couldn’t find solid answers to: 1) Just how effective a home-built smoke control would be? 2) What sort of air flow volume would be needed?
I recently put together a system inspired by @StringBean laser fume hood and an AC Infinity CLOUDLINE PRO S6 6” Inline Duct Fan venting outdoors.
View of whole system:
View from underneath laser shroud mouth:
V
I’m not going to spend a lot of time discussing the system itself, but rather, share some measurements I made quantifying how well it worked. I’ve had a Dylos particle counter in my shop for over fifteen years and I used it to measure smoke levels under various conditions.
The first measurements were smoke levels with the system working and then turned off. The Dylos particle counter was approximately six feet away from the Avid CNC. It was measuring the smallest particles. The laser was the Opt 15W, engraving bamboo.
Base Level (pre lasering): ~100 (this can vary a lot, ranging from ~22 to 300).
Lasering with mitigation, fan on full: ~280-430, average ~330.
Lasering with fan off: 4,000 within 2.5 minutes, 12,800 about 5 minutes later. Pretty nasty.
I had wanted to know how much airflow would be required, as I had an interest in a standalone smoke extractor like the Fumex. The AC Infinity I bought just vents to the outside with a stated maximal airflow of 351 cfm. It also has a wired fan controller for speed control. In these measurements I set the Opt to basically continuously ‘char’ the bamboo while I varied airflow. These conditions are far worse than I’d run into with laser engraving but made the measurements easier. I typically left the fan on each setting for about 5 minutes before recording the level.
Base Level: ~120
Fan on full (10): 600
Setting 8: 1127
Setting 6: 1132
Setting 4: 1750
Setting 2: 2700
3 minutes after fan off: 12,800
I made no attempt to verify the actual airflows, nor do I know if the controls are linear. But even at the lowest level the extraction was not bad.
The last set of measurements were taken the next day during an actual bamboo laser engraving session. A board takes about 22 minutes, laser power is typically 45% at 85 ipm.
Pre lasering: ~500 (a bit high)
Fan half-speed at 11 minutes: 505
16 minutes: 1020
20 minutes: 807
End: 1070
To add perspective on these measured levels this is what I observed. You could see smoke pouring out the vent outside the window. No smoke was visible in the shop, and I could barely detect the smell of smoke. I’m not sure I’d know I was laser engraving. When the levels are at 12,000, you definitely know you shouldn’t be in there. I had one window open across the shop to allow air to freely flow out the vent, but otherwise the shop was closed up. I’m very happy with how this turned out. It’s certainly going to make laser engraving a lot more pleasant and productive.


