Need something for 4 x 8 sheets but also for smaller things. Was thinking about airweights for smalller things and not as much noise (I assume, have not actually seen in real life).
For 4x8 sheets your best bet is going to be a “universal” vacuum.
Usually these consist of having three layers on your machine:
Bottom layer solid plywood
Middle layer a plenum
Top layer LDF (low density fiberboard)
Then you plumb a vacuum pump into it like this:
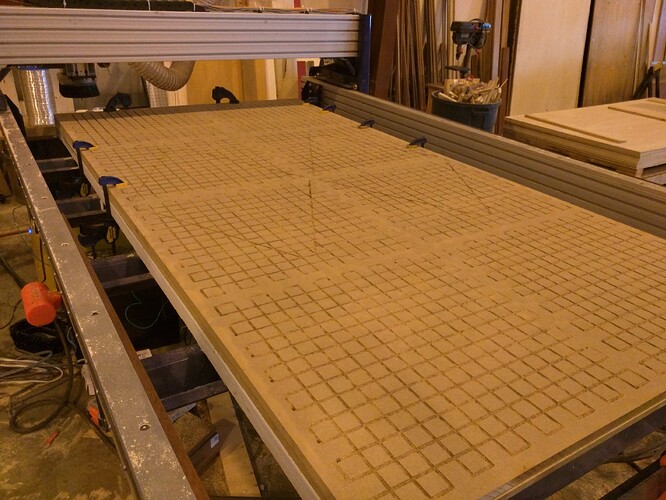
and you can suck down full sheets. You can valve off areas too to increase suction as you remove parts. This one one I made for another machine about 10 years ago:
You can see the three layers, base on bottom, plenum and then the top LDF layer
I had this valve system connected to a black box hurricane. I had 8 24x24 zones. I could turn on/off any zone at any time. So if I was working on a full sheet for cabinets I’d open them all up. If I had some smaller work that needed a ton of suction I’d turn off all but one zone and direct all of the suction there.
This setup was pretty versatile. It worked best for me as at the time I was doing mostly sheet goods.
Airweights/vac pucks are great if you’re doing smaller work all the time.
I would start with a caution: on a vacuum table, a concentrated amount of heat can quickly escalate to a significant fire with all that air movement. As Eric would say – “ask me how I know” ![]()
I have 4x8 vacuum section on my 5x10 Avid using a home built system and control box very much like the black box hurricane system (controllable as 2 to 4 pumps, piped to 4 zones of 2’ x 4’ each).
The table base/plenum is a sheet of melamine with routed channels. Channels and all edges are sealed with epoxy and/or polyurethane. Four isolated zones with PVC plumbing attaching to a hole in the center, much like the picture above. Each zone to its own valve. Upper layer is MDF that had the surface finished removed on both sides. MDF is carefully glued to the melamine. DIY’ed for cost reasons mostly.
Here are some tips and some things I will do differently if I change the system.
- A good filter inline with the vacuums is IMHO a must. I bought the one black box sells and it is great.
- If DIYing, there are vacuum pumps that do not need bleed air to keep cool and have thermal protection. I would use those.
- These style vacuums are extremely loud and generate heat and a lot of air movement. Plan accordingly
- I would use five zones next time. 1’ x 4’ zone 1 along X0 axis. Two 2’x3’ to cover the half sheet remaining, then two 2’x4’ zones. All five zones used for a full 4x8 sheet, but having a single zone for small pieces.
- I would have embedded brass threaded inserts (E-Z LOK 400-4 Threaded Insert, Brass, Knife Thread, 1/4"-20 Internal Threads, 0.500" Length (Pack of 25): Helical Threaded Inserts: Amazon.com: Industrial & Scientific) in strategic places to allow easily adding fixture plates on top of the vacuum portion of the table.
- A permitter along Y-, Y+, and X- of dog holes and/or T-track outside the vacuum area. (I have 5x10, so the six inches on either side of the vacuum section has this. I didn’t add this at X-, which I wish I had)
- I would probably do two full sheets of 5x5 baltic under the plenum like Eric suggested above. I don’t think I would miss the lost extra 3/4" of Z clearance.
- Location pins or other indexing points is nice if doing a lot of repeated sheet material
- Plan the install of the bottom most sheet well. I can fairly easily replace my whole setup and have all mounting holes line up
After using your first table, you’ll probably have a lot of ideas for the next iteration!
Check out All Star CNC Products, Very friendly and helpful company, they have some pretty good videos to give you some ideas. I ordered a few different sizes of their seals and ordered some 1" 24" x 24" poly material from Piedmont Plastics, then used my CNC to build some vacuum hold downs. I can bolt down to my table and also made specific fixtures for some of the things I make all the time.
Vacuum tables are a complex topic, and the technology you choose depends on whether you’re working with small objects or full sheets of plywood.
This is my third vacuum table, as I frequently produce small objects in batches. I initially started with an LDF-based vacuum table paired with a side blower. It worked great for full sheets of plywood or anything wider than 30 cm, but I had a lot of trouble with small batch production.
To improve this, I switched to an aluminum vacuum table placed on the spoilboard, still using the side blower. While it performed better, I couldn’t utilize the full working area of my CNC.
Now, I’ve moved to an oil-free rotary vane vacuum pump with a custom-made HPL plenum and gaskets. This setup allows me to achieve -0.8 bar at full vacuum, enabling me to securely hold objects as small as 10 cm wide. For certain jobs, I create custom fixtures with gasket offsets around the final shape, which gives me the best results.
I’ve learned a lot from the YouTube channel Pierson Workholding.
I had the same issues with mine. I used to produce a lot of HDPE parts that were small. I’d onion skin them and then flip them on to a holding jig and cut them the rest of the way through.
Are you talking about one of those grid aluminum bases that you put gasket in to hold whatever you want?
I’d love to see some pictures of that…
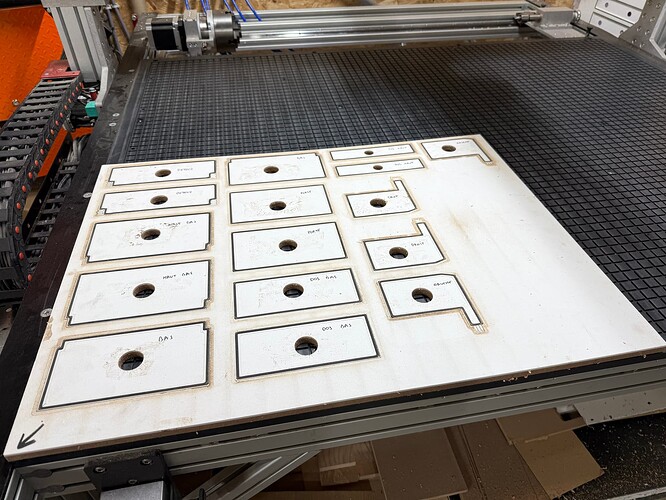
We bought the Black Box Hurricane for our CNC. For large sheet work items it works GREAT and I love it. Here is our plenum set up.
But most of what I do is surfacing large live edge slabs and cookies. Where the vacuum table is basically useless. ![]()
So we came up with a simple hack. We bought a bunch of self healing cutting boards. The type that quilters use and then use double sided tape to hold it in place. The vacuum table holds them down well and we can do small items or odd shaped items.
If we need to cut something out we have one set up with a small piece of MDF on and use that as a spoilboard.
I do this a lot. I make small spoons—thousands of them. I machine one side using my vacuum table, then flip them into a holding jig like this one.
Yes, exactly. But the one I bought didn’t have a gasketing system—it was just a surface with very tiny holes. I used a rubber layer on top with custom shapes that matched the pieces I was cutting. It worked great, but even with the largest model, I was still limited in size.
Then I built a full-size vacuum table out of PVC, but I only kept it for three months because the thickness variations were too significant. This made it impossible to achieve a proper onion skin. I machine a lot of HDPE, so I need a real onion skin—one that can be easily cut with a knife, not a 1mm-thick layer.
My latest table is made of HPL—quite expensive, but I’m very happy with it. I also upgraded to a rotary vane vacuum pump, which is much more powerful. I didn’t create fixed zones because I wanted the flexibility to define my own, so I only have six entry points, allowing me to configure the setup however I need around them.
When I run a batch, I create a custom jig that sits on top of my vacuum table.
These jigs are made from PVC foam (very cheap) or MDF, which I have to seal. They also have a custom gasket contour.
For very small pieces, I place double-sided tape in the center of the jig to add extra grip to the vacuum’s holding power. With this technique, I can now machine pieces as small as 5 cm wide. Adding sandpaper also works great for extra hold.
Hope that will give ideas to some of you ![]()
What material is the blue part?
3/4" HDPE. Bought at a local plastics company.
Do you have anything underneath the HDPE? I’d be interested in recreating your setup. Would you be willing to share the cut file for the HDPE or any other photos of the setup? We are looking at the Hurricane vacuum. Thanks in advance.


