Got a call from my daughter who was re-doing a pantry in her house. She was looking for some shelf brackets and could not find the right combination of “heavy duty” and meeting her idea of aesthetics. She already had an idea in mind, similar to something she had seen elsewhere but customized. We sat down on the computer and came up with the following:

For the horisontal and vertical pieces we went with 1/4in thick A36 mild steel. For the “web” we went with 10Ga (0.135in) 1018. 1018 is loosely similar to A36 from a yield strength in tension standpoint. In compression however, since 1018 has tighter defined controls on the ratios of alloying elements, from a buckling standpoint, it is superior.
The design is straight forward. The horizontal and vertical parts have slots and the 4x ends of the web have matching tabs. The tabs are only 1/2 the thickness of the material with the slot so there is a good amount of room to fill with a heavy duty weld that can still maintain its strength after grinding flat and the front side is completely clean.
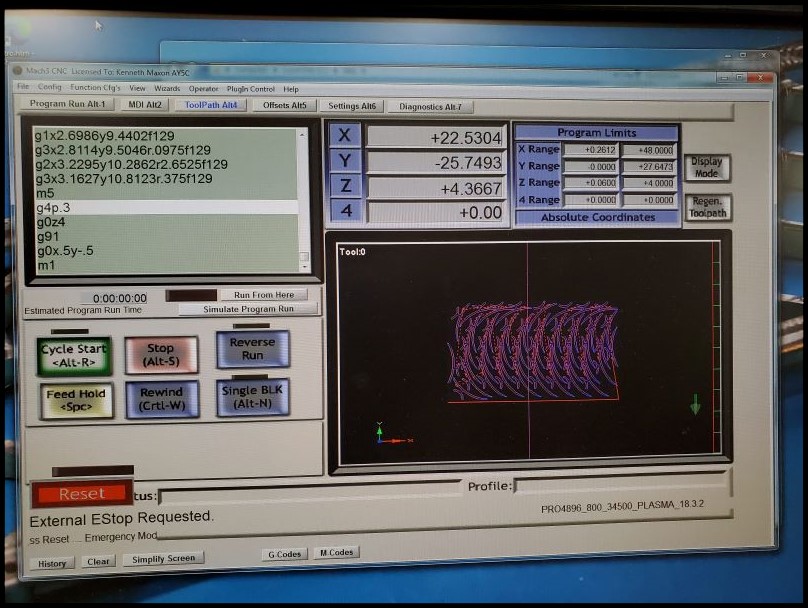
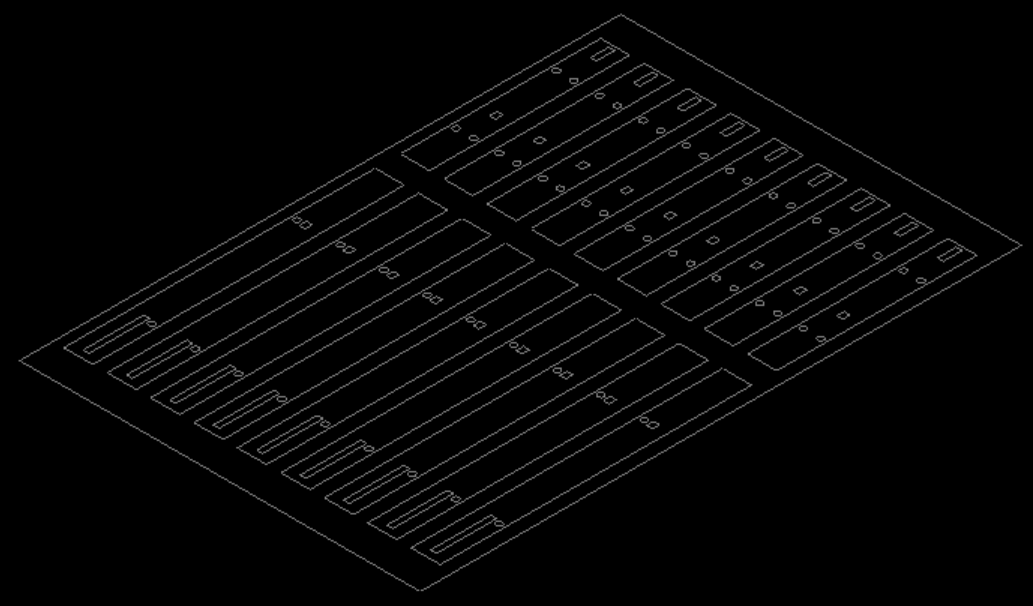
The whole trick to this project is that she asked for 45 of these brackets. ![]() I hand nested these into a plate in my legacy CAD system and went to town.
I hand nested these into a plate in my legacy CAD system and went to town.


Not sure if this video link will come through:
https://drive.google.com/file/d/1AGU82ua1IGum2gRKssD6D0Q6b0v3AdDJ/view?usp=sharing


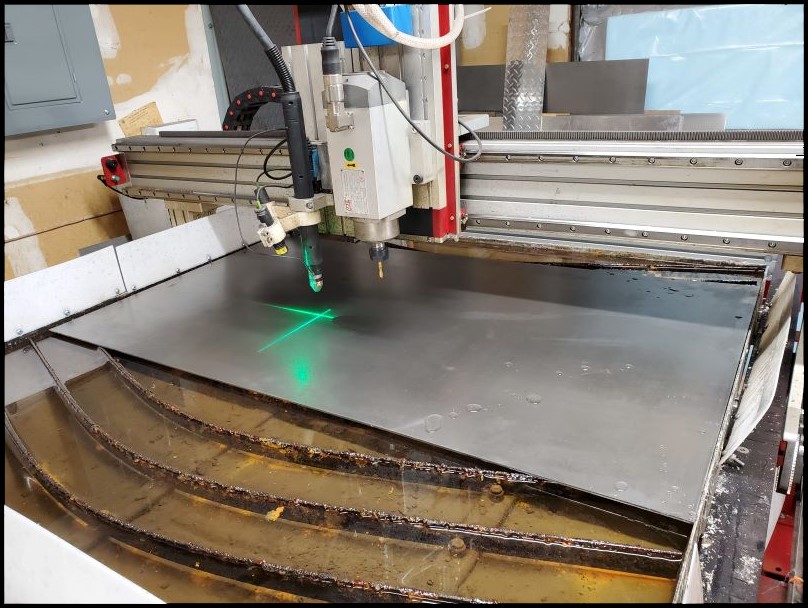
In the image below the crispness of the slots/features really shines through. Cleanup is pretty minimal on these parts.

Here the parts are just manually setup fresh off the machine. Haven’t slag chipped them or cleaned them up at all yet. One extra advantage of the tab-slot design styple is that it allows the long thin taper, to have a tab behind it so that there is more ‘meat’ there and it doesn’t want to erode away from a fine point under the plasma. That fine “blending” can also be seen in the image below, before the parts are even cleaned up.

I was going to go after each one of these with a chipping hammer, but the slag was so light it turned out to be much faster to just hit them all on the slack-belt portion of the 2x72" belt grinder.

Taper in the holes were chased with a step drill and the float lock vise on the drill press. Normally this is a step I don’t have to do, but I forgot to drop the travel speed by ~30% for small hole profiles so they came out with a tiny bit too much taper.

The parts were then set up for welding. I welded out the inside first (set-up in a FireBall Tools mega square) and then went back and welded out the outside and tab/slots in 5x places.


The picture, below, tells the story, with 45 parts in the set, there is a good amount of work there.

I didn’t capture any photos but after this step there was a pretty lengthy process to go back and grind flat / tangent all those welds.
Next up the parts were hung and powder coated.

The shot below shows the parts with powder applied going into the oven, before re-flow.

One thing is for sure, … powder coated steel in a nice dry pantry, … These heavy duty shelf brackets may outlast the house. ![]()
Installation:


I am quite glad that I did not have to do all the work installing these, getting all the screws into the studs, getting them all leveled out, etc. That was a whole additional job that she and her husband took on!
Anyway, a simple AVIDcnc / plasma project to share from late winter 2021 that seems to have turned out pretty well.