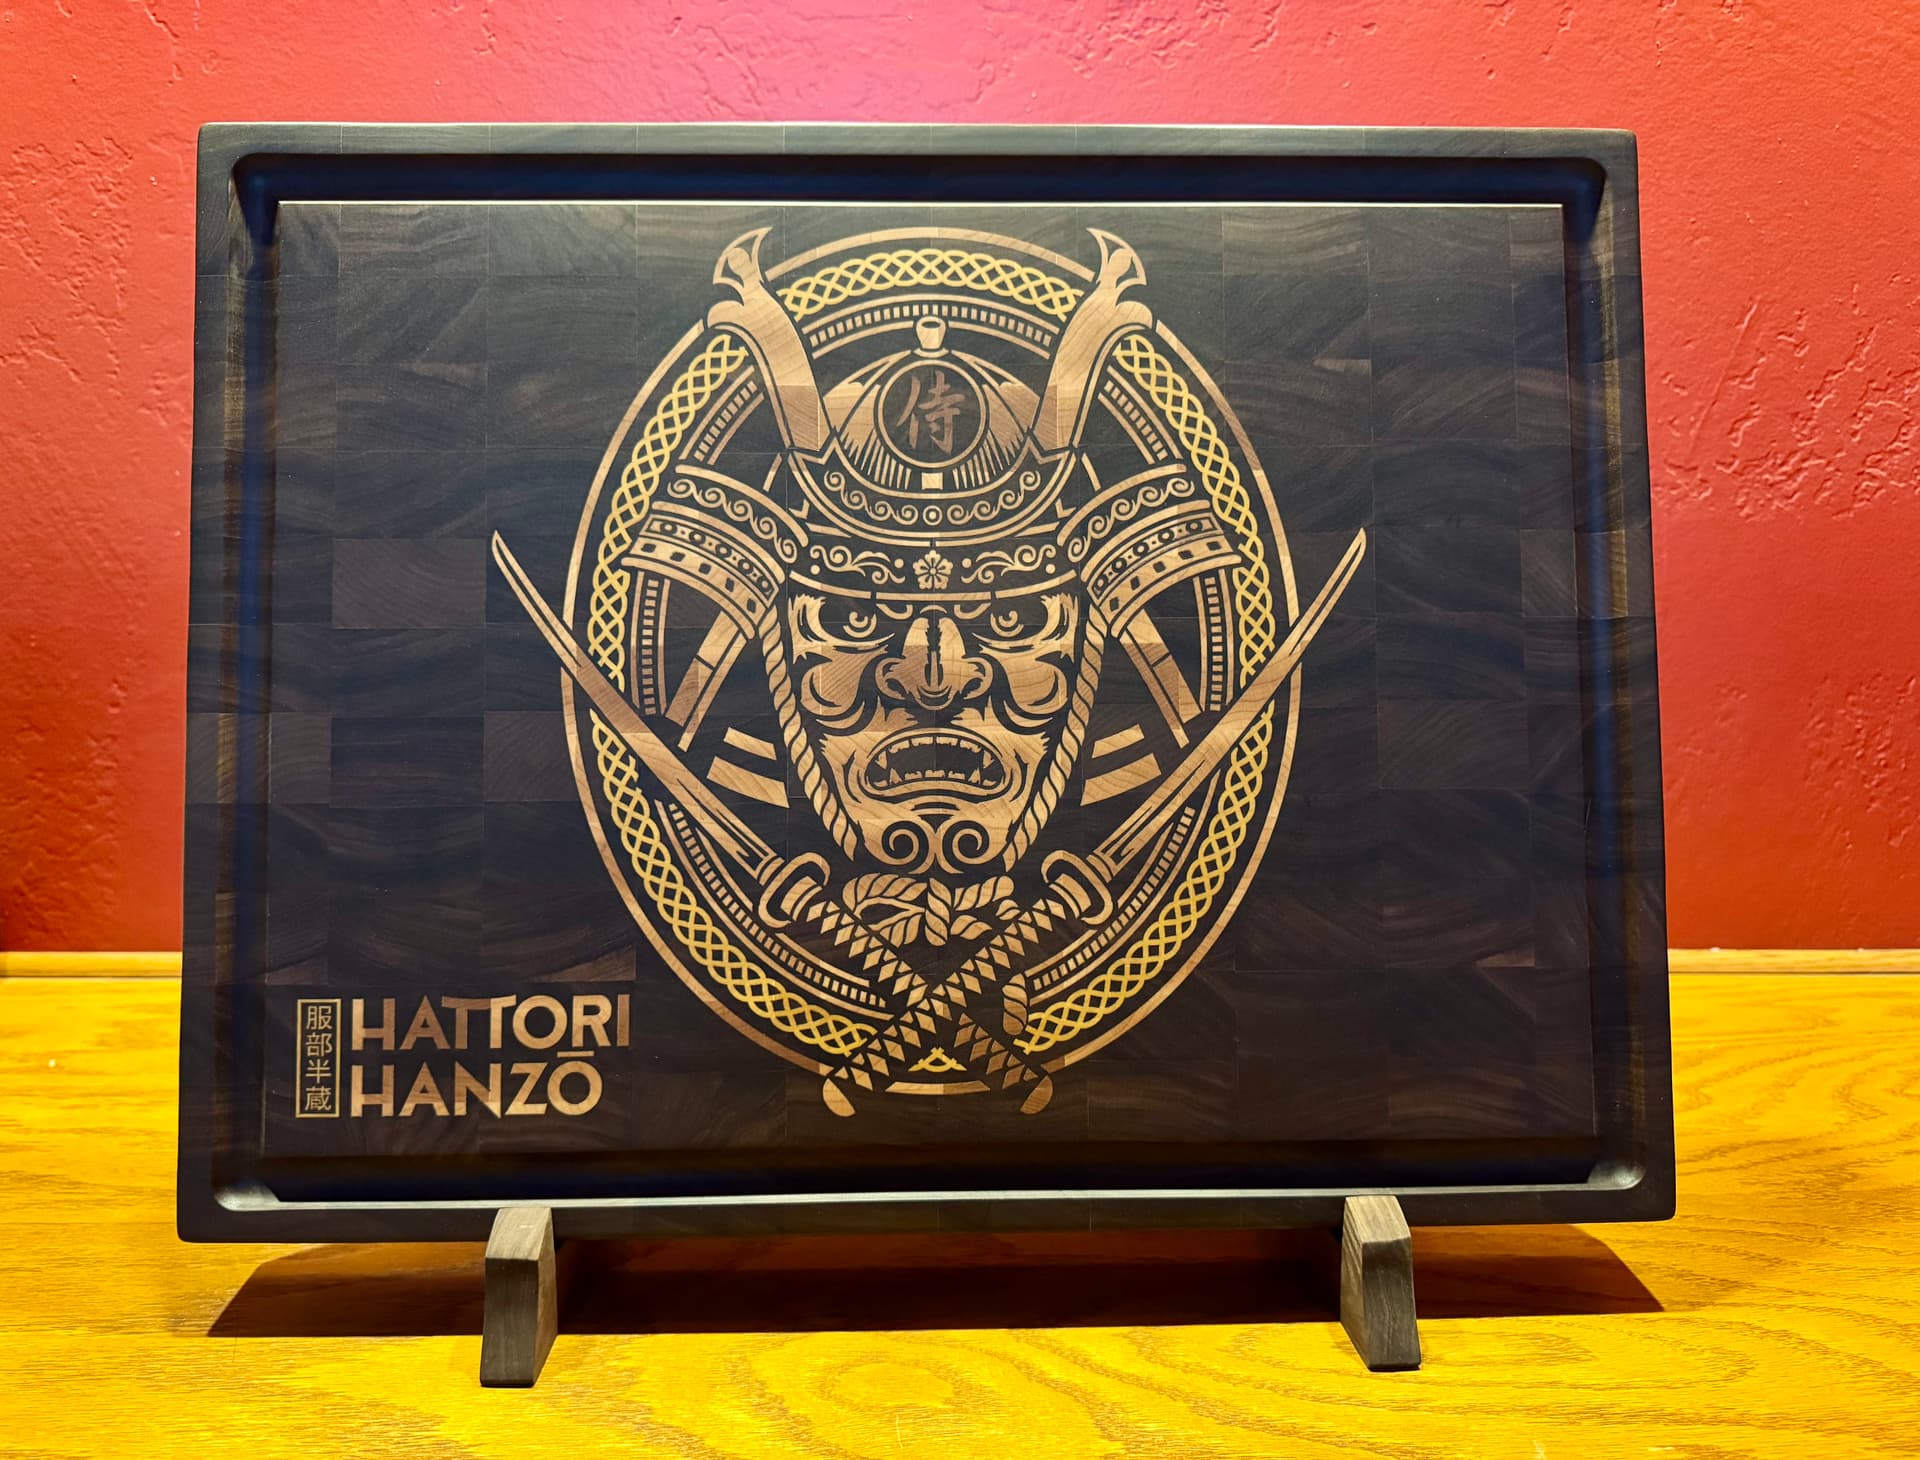
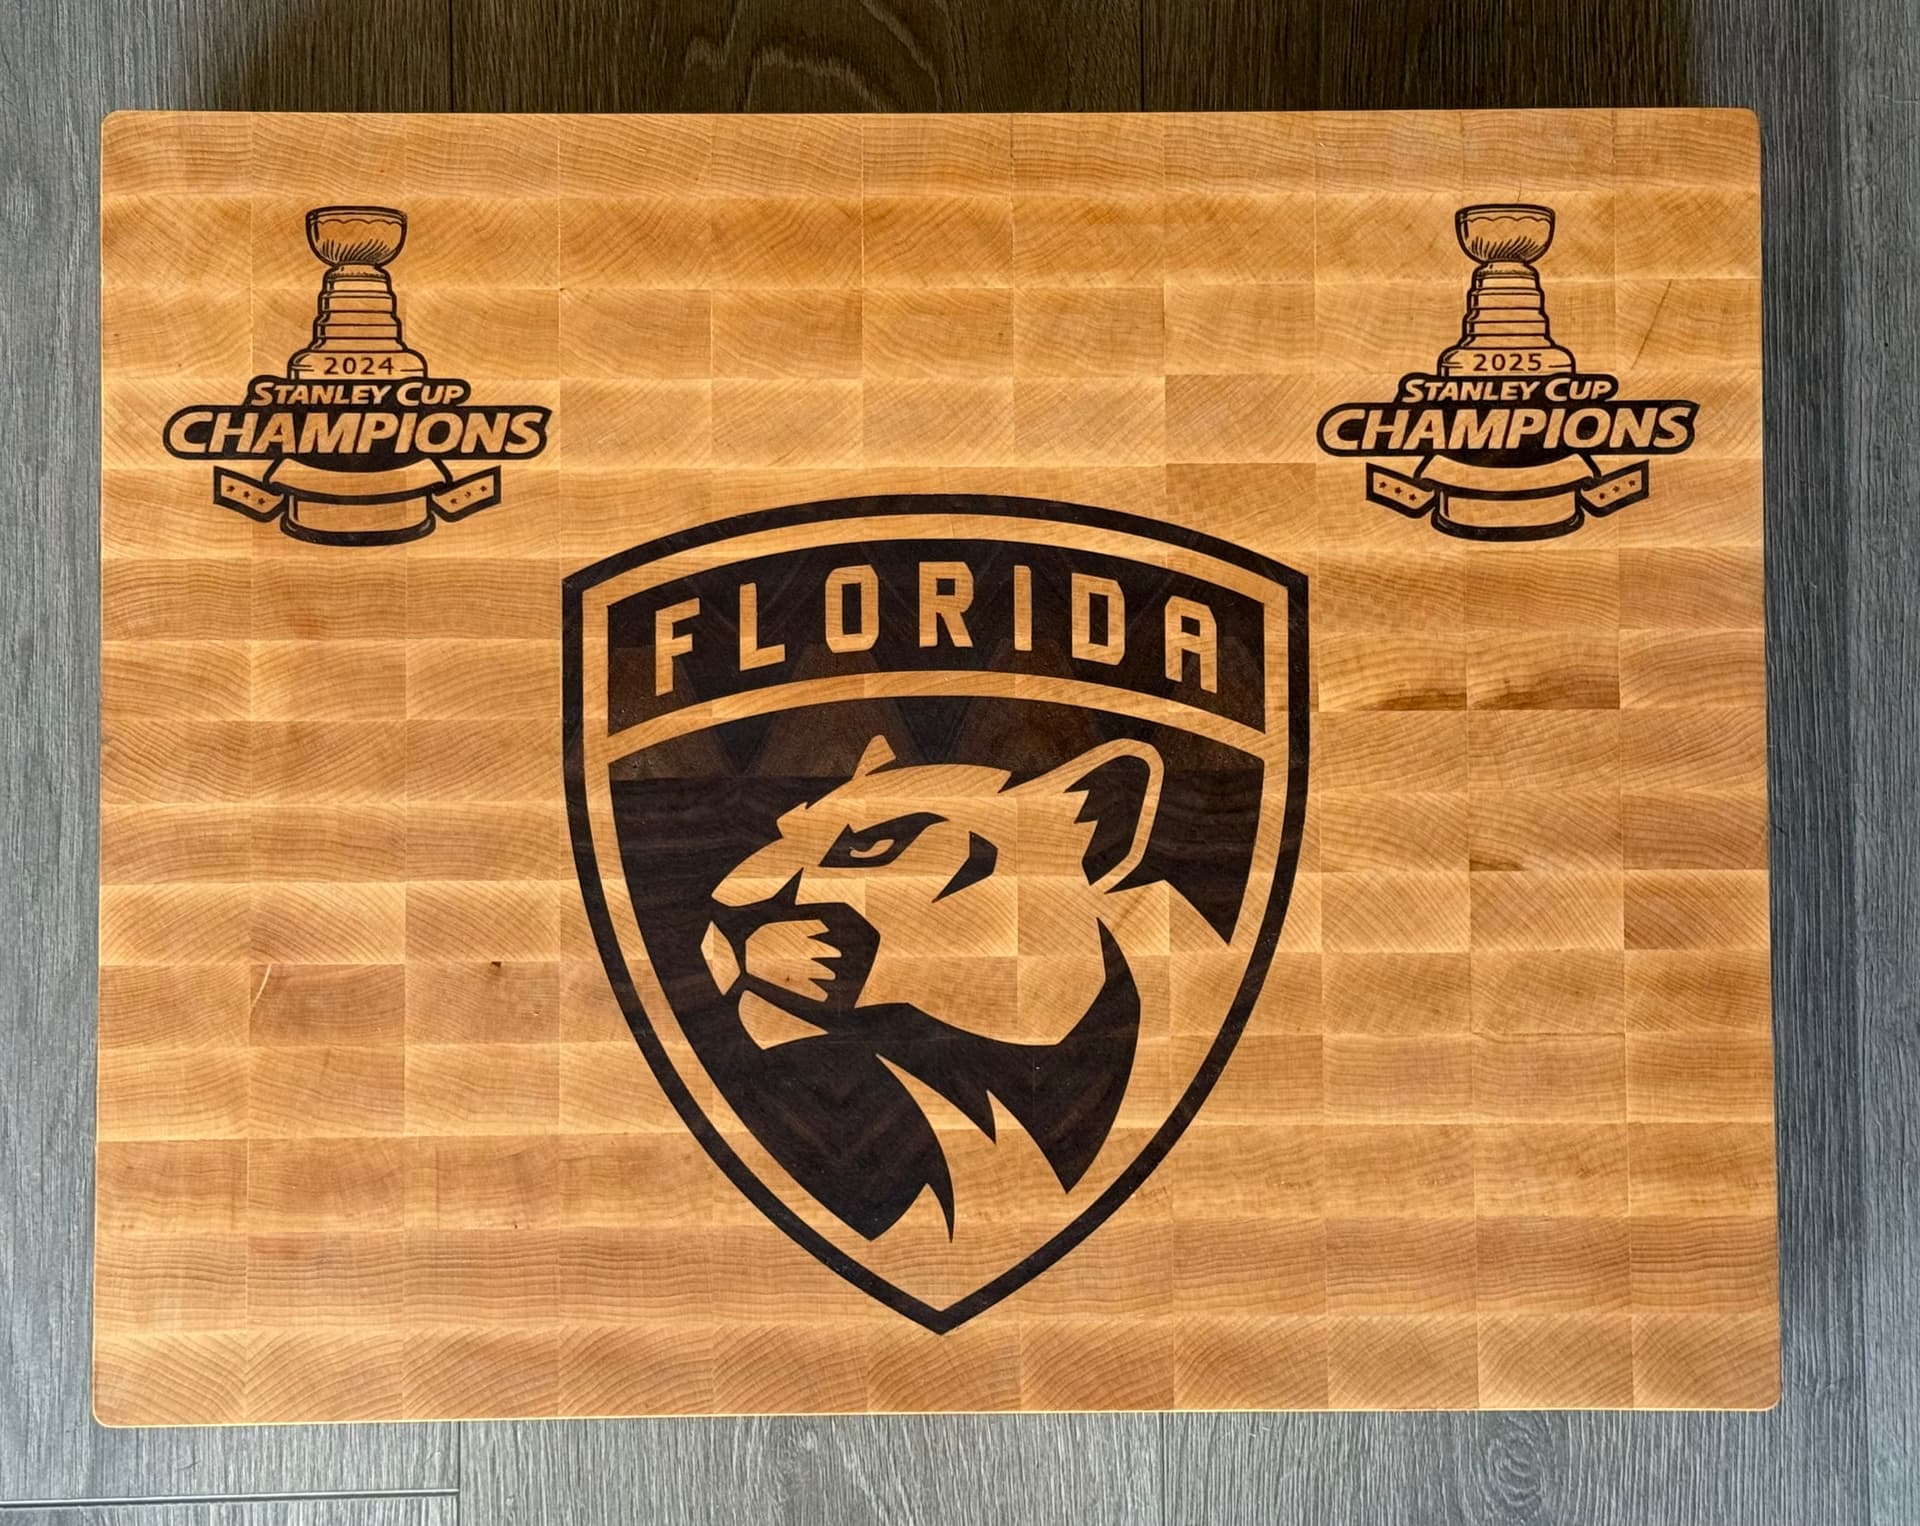
I have had my Avid Pro 48x48 for about two years now. I was concerned as many others were about the vibration with the aluminum frame with the raw power of this machine. Many online comments said it wasn’t stiff enough to do detailed cuts. One of my favorite creators in woodworking is BroInWood and the cutting boards he makes are truly next level. I saw him make several versions of this board and always wanted to try it.
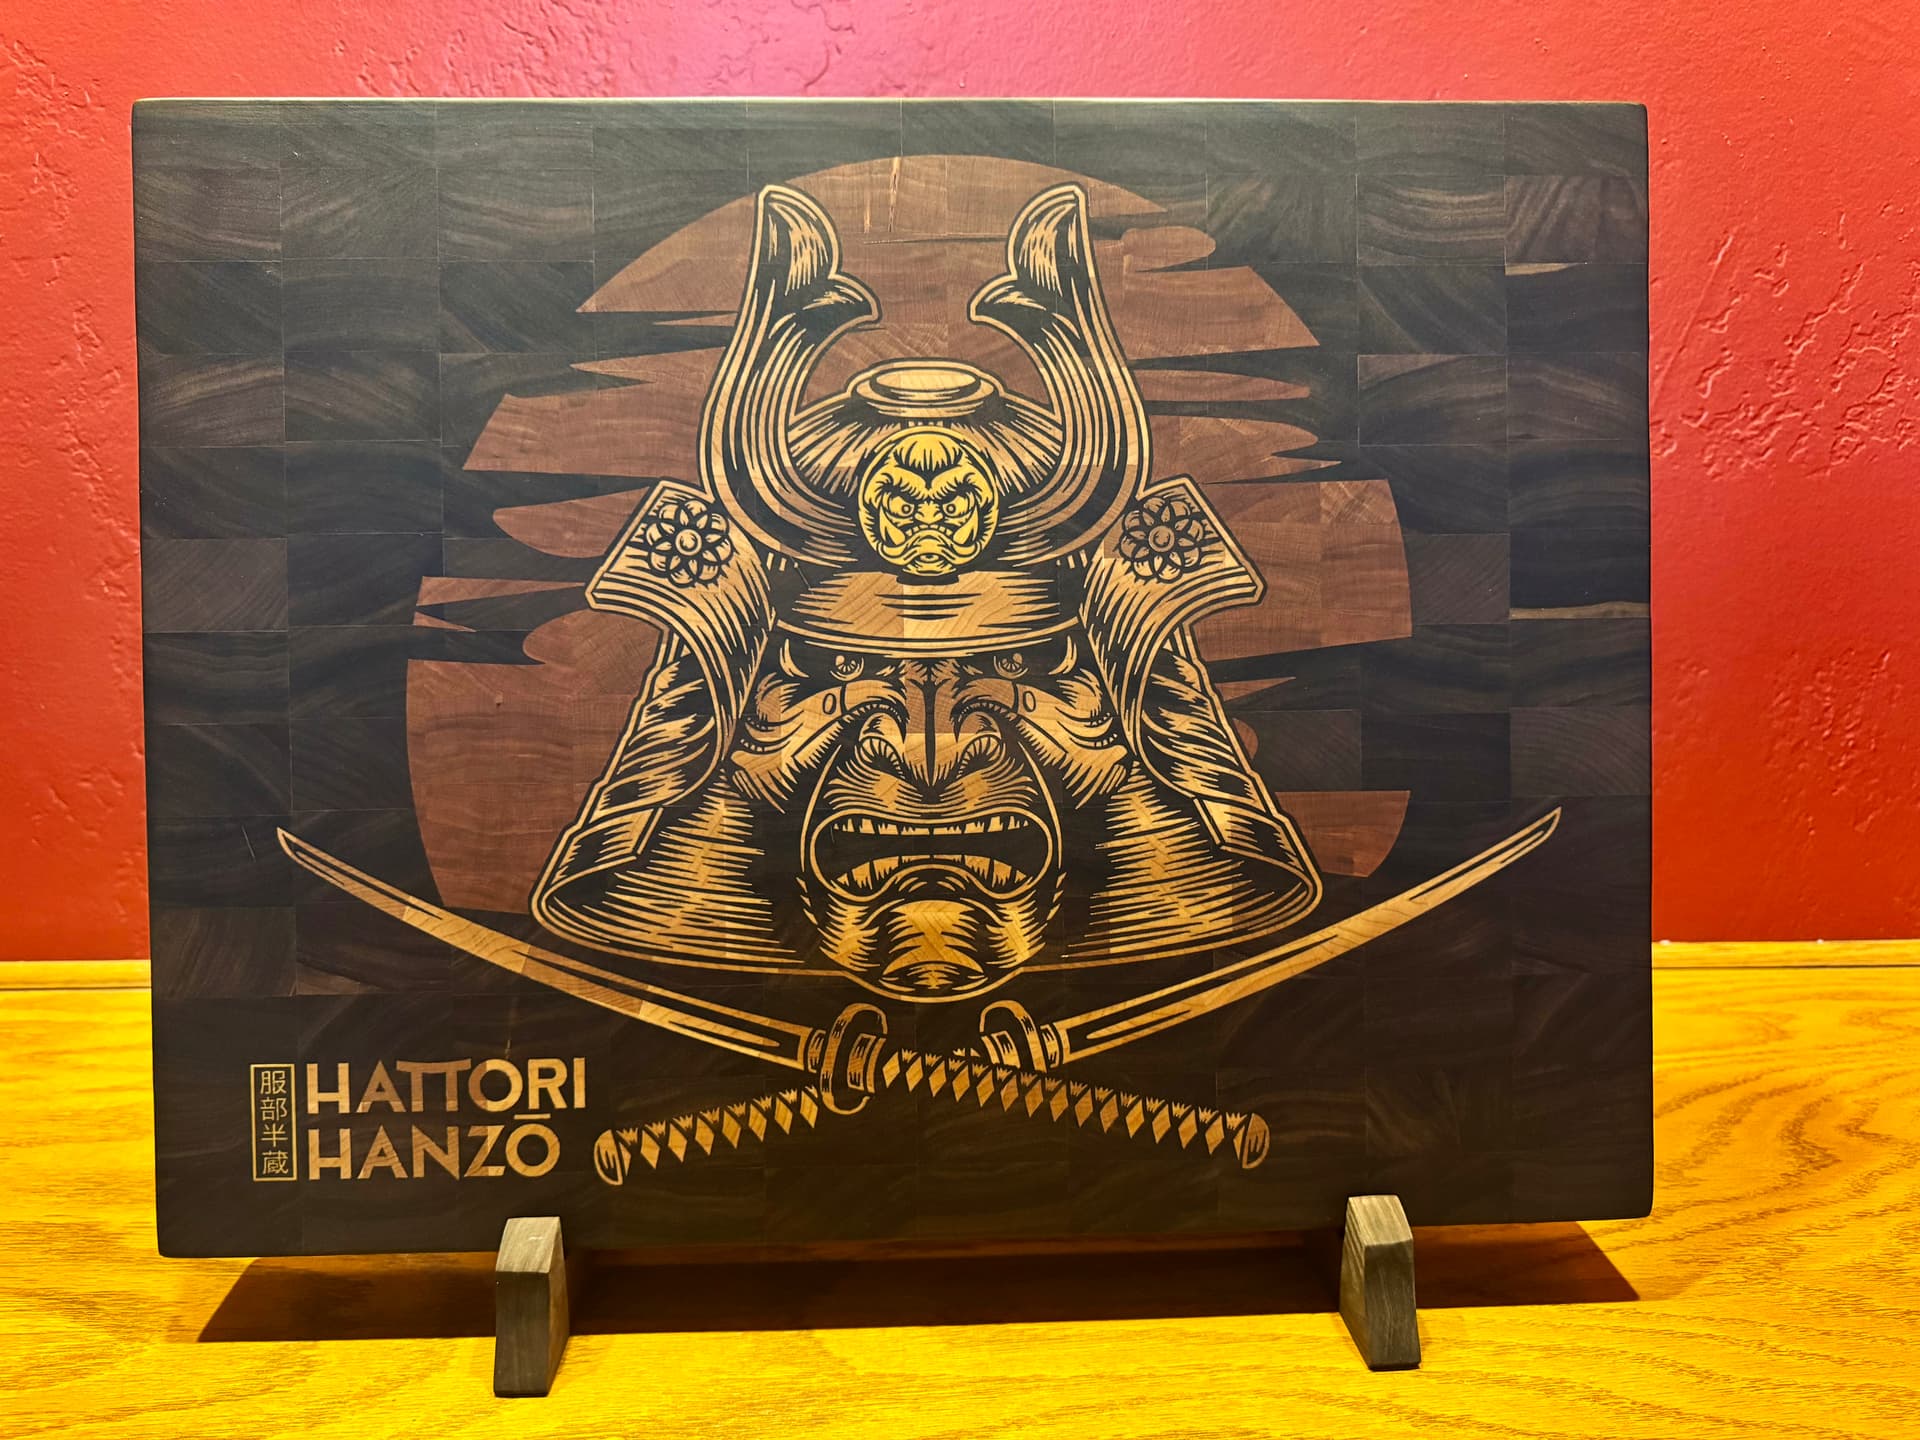
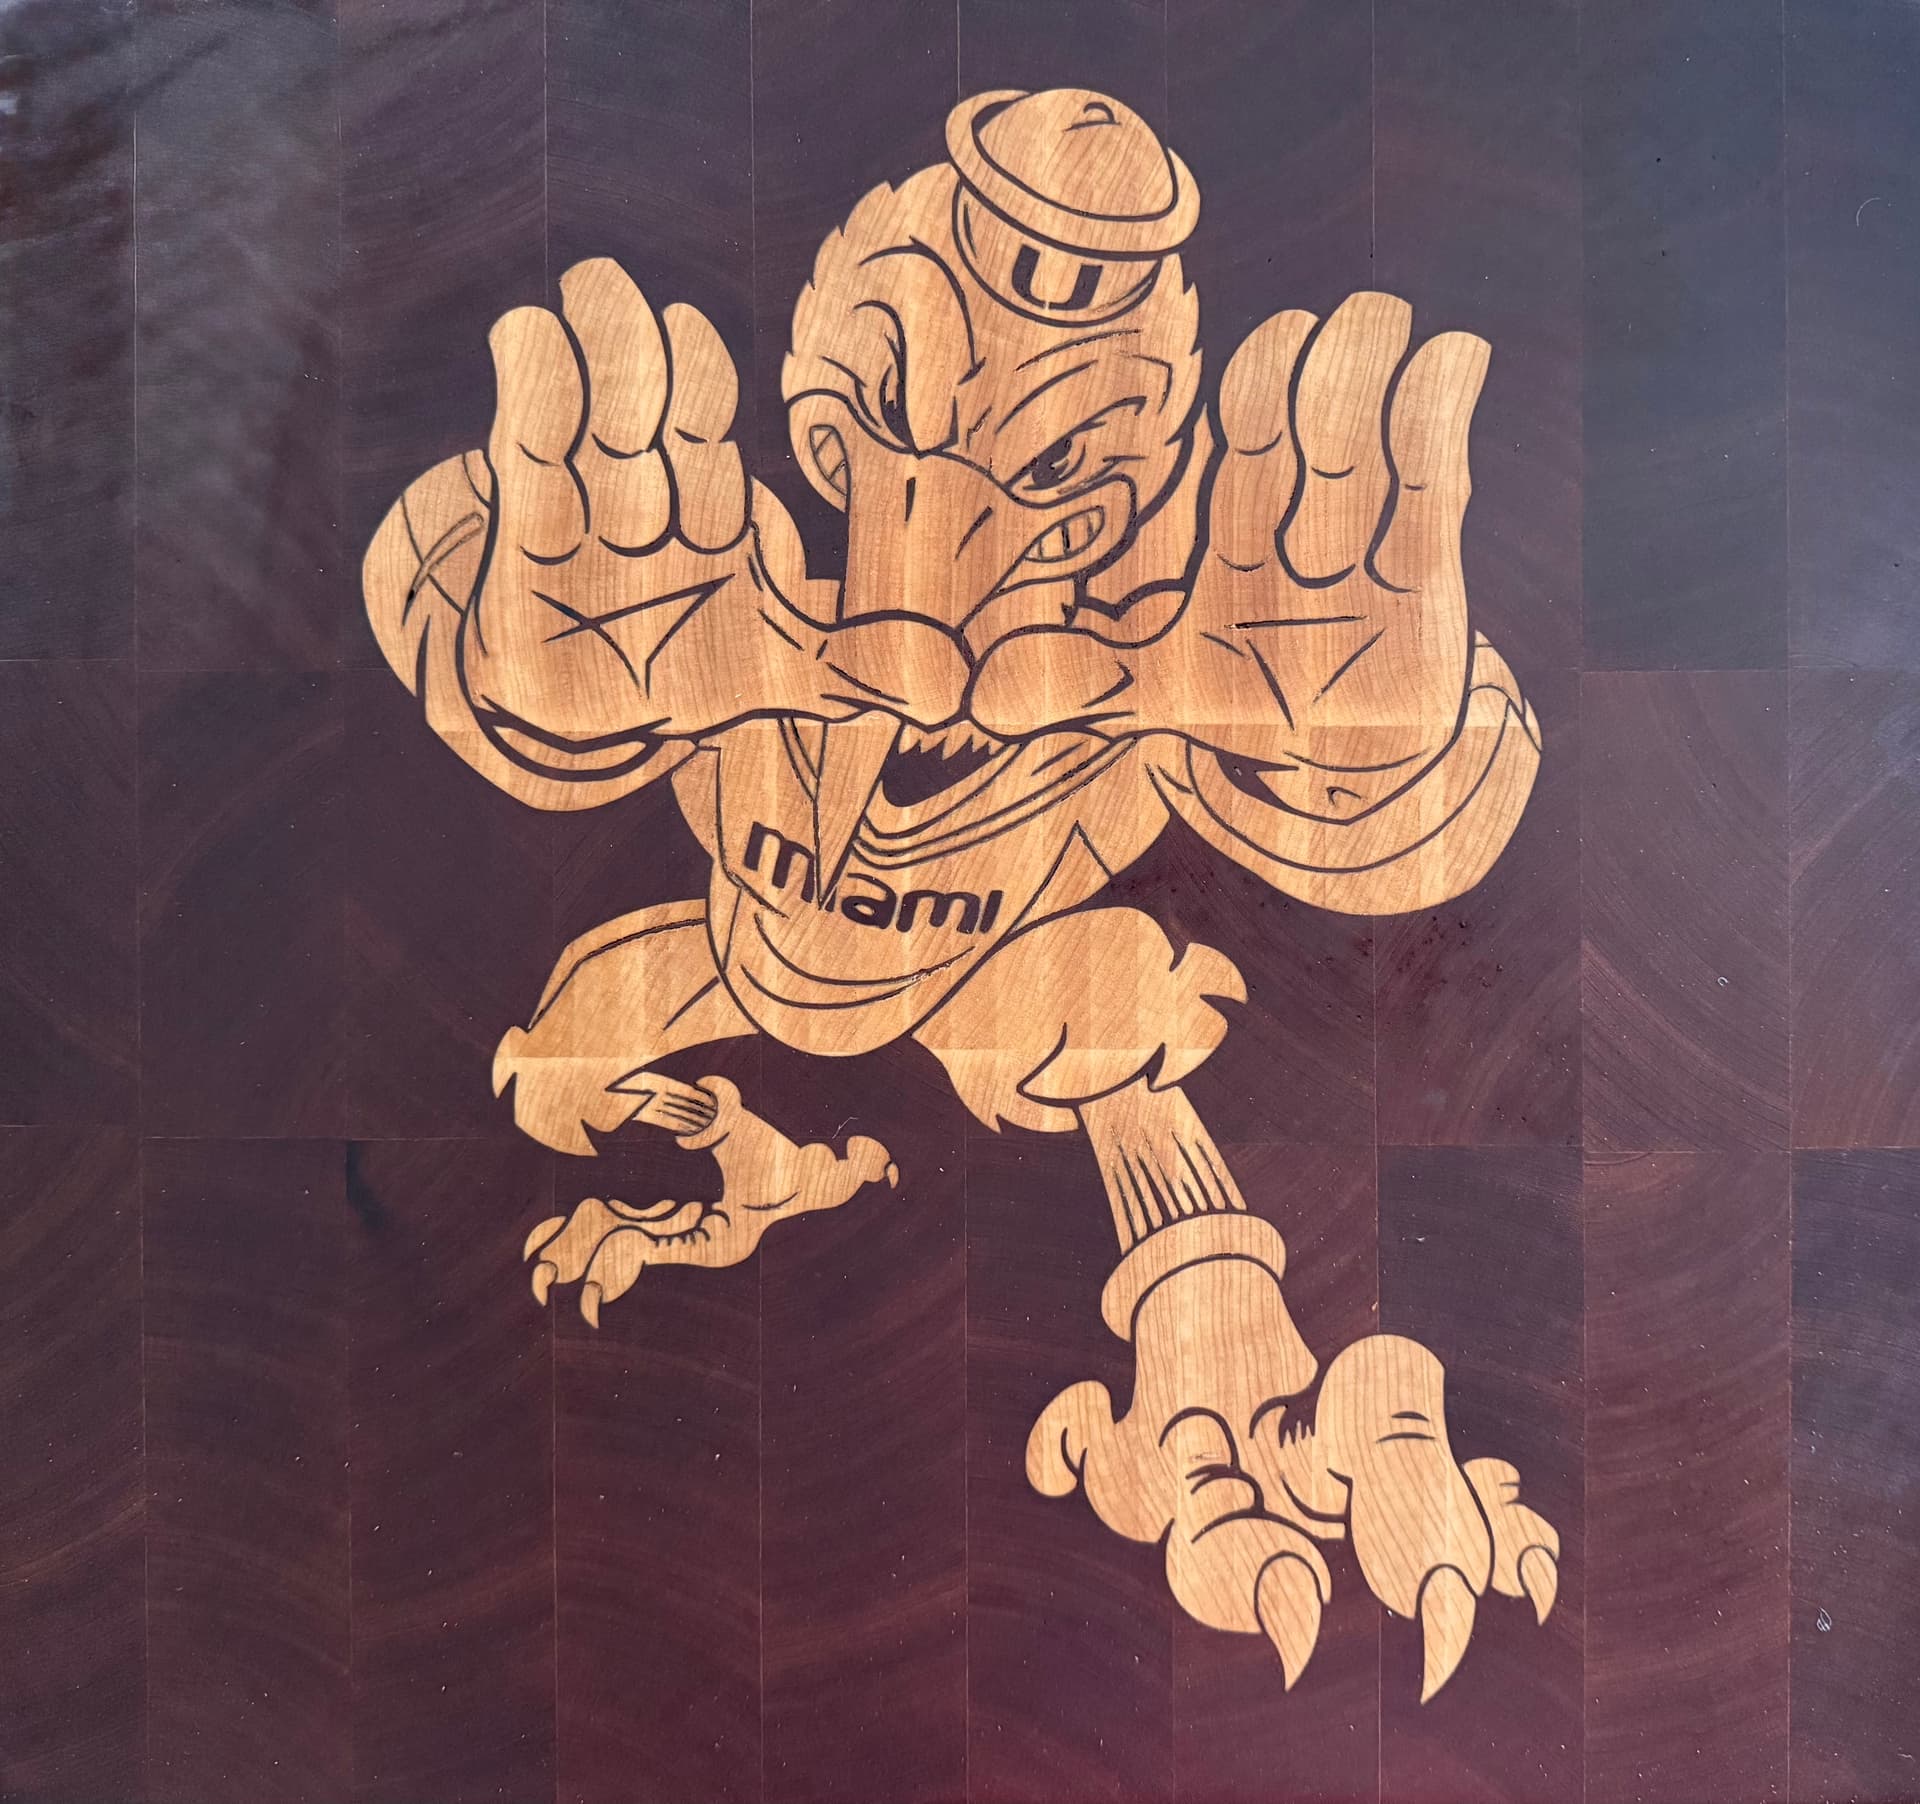
So, several months back I started working on it. This was done entirely on the 48x48 using VCarve and a 6.2mm ball nose bit along with other clearance bits. The first side came out so well I did a second design on the back. I only use this as a display piece and could never put a knife to it but it sure does get some great reactions when friends see it.
I don’t normally post things like this or try to show off any work but thought I would do this for any of those worried that they can’t make detailed CNC carvings with this machine. You absolutely can. Just slow things down and do practice carves to see what works. Most important, just have fun and enjoy making stuff…Rick
I’ve been doing inlays like this for some time on the avid. It was one of the reasons I got the machine to be honest. I needed more rigidity and repeatability. Now I have gone to add servos and an ATC which makes the process even that much better. Here are some that I’ve completed
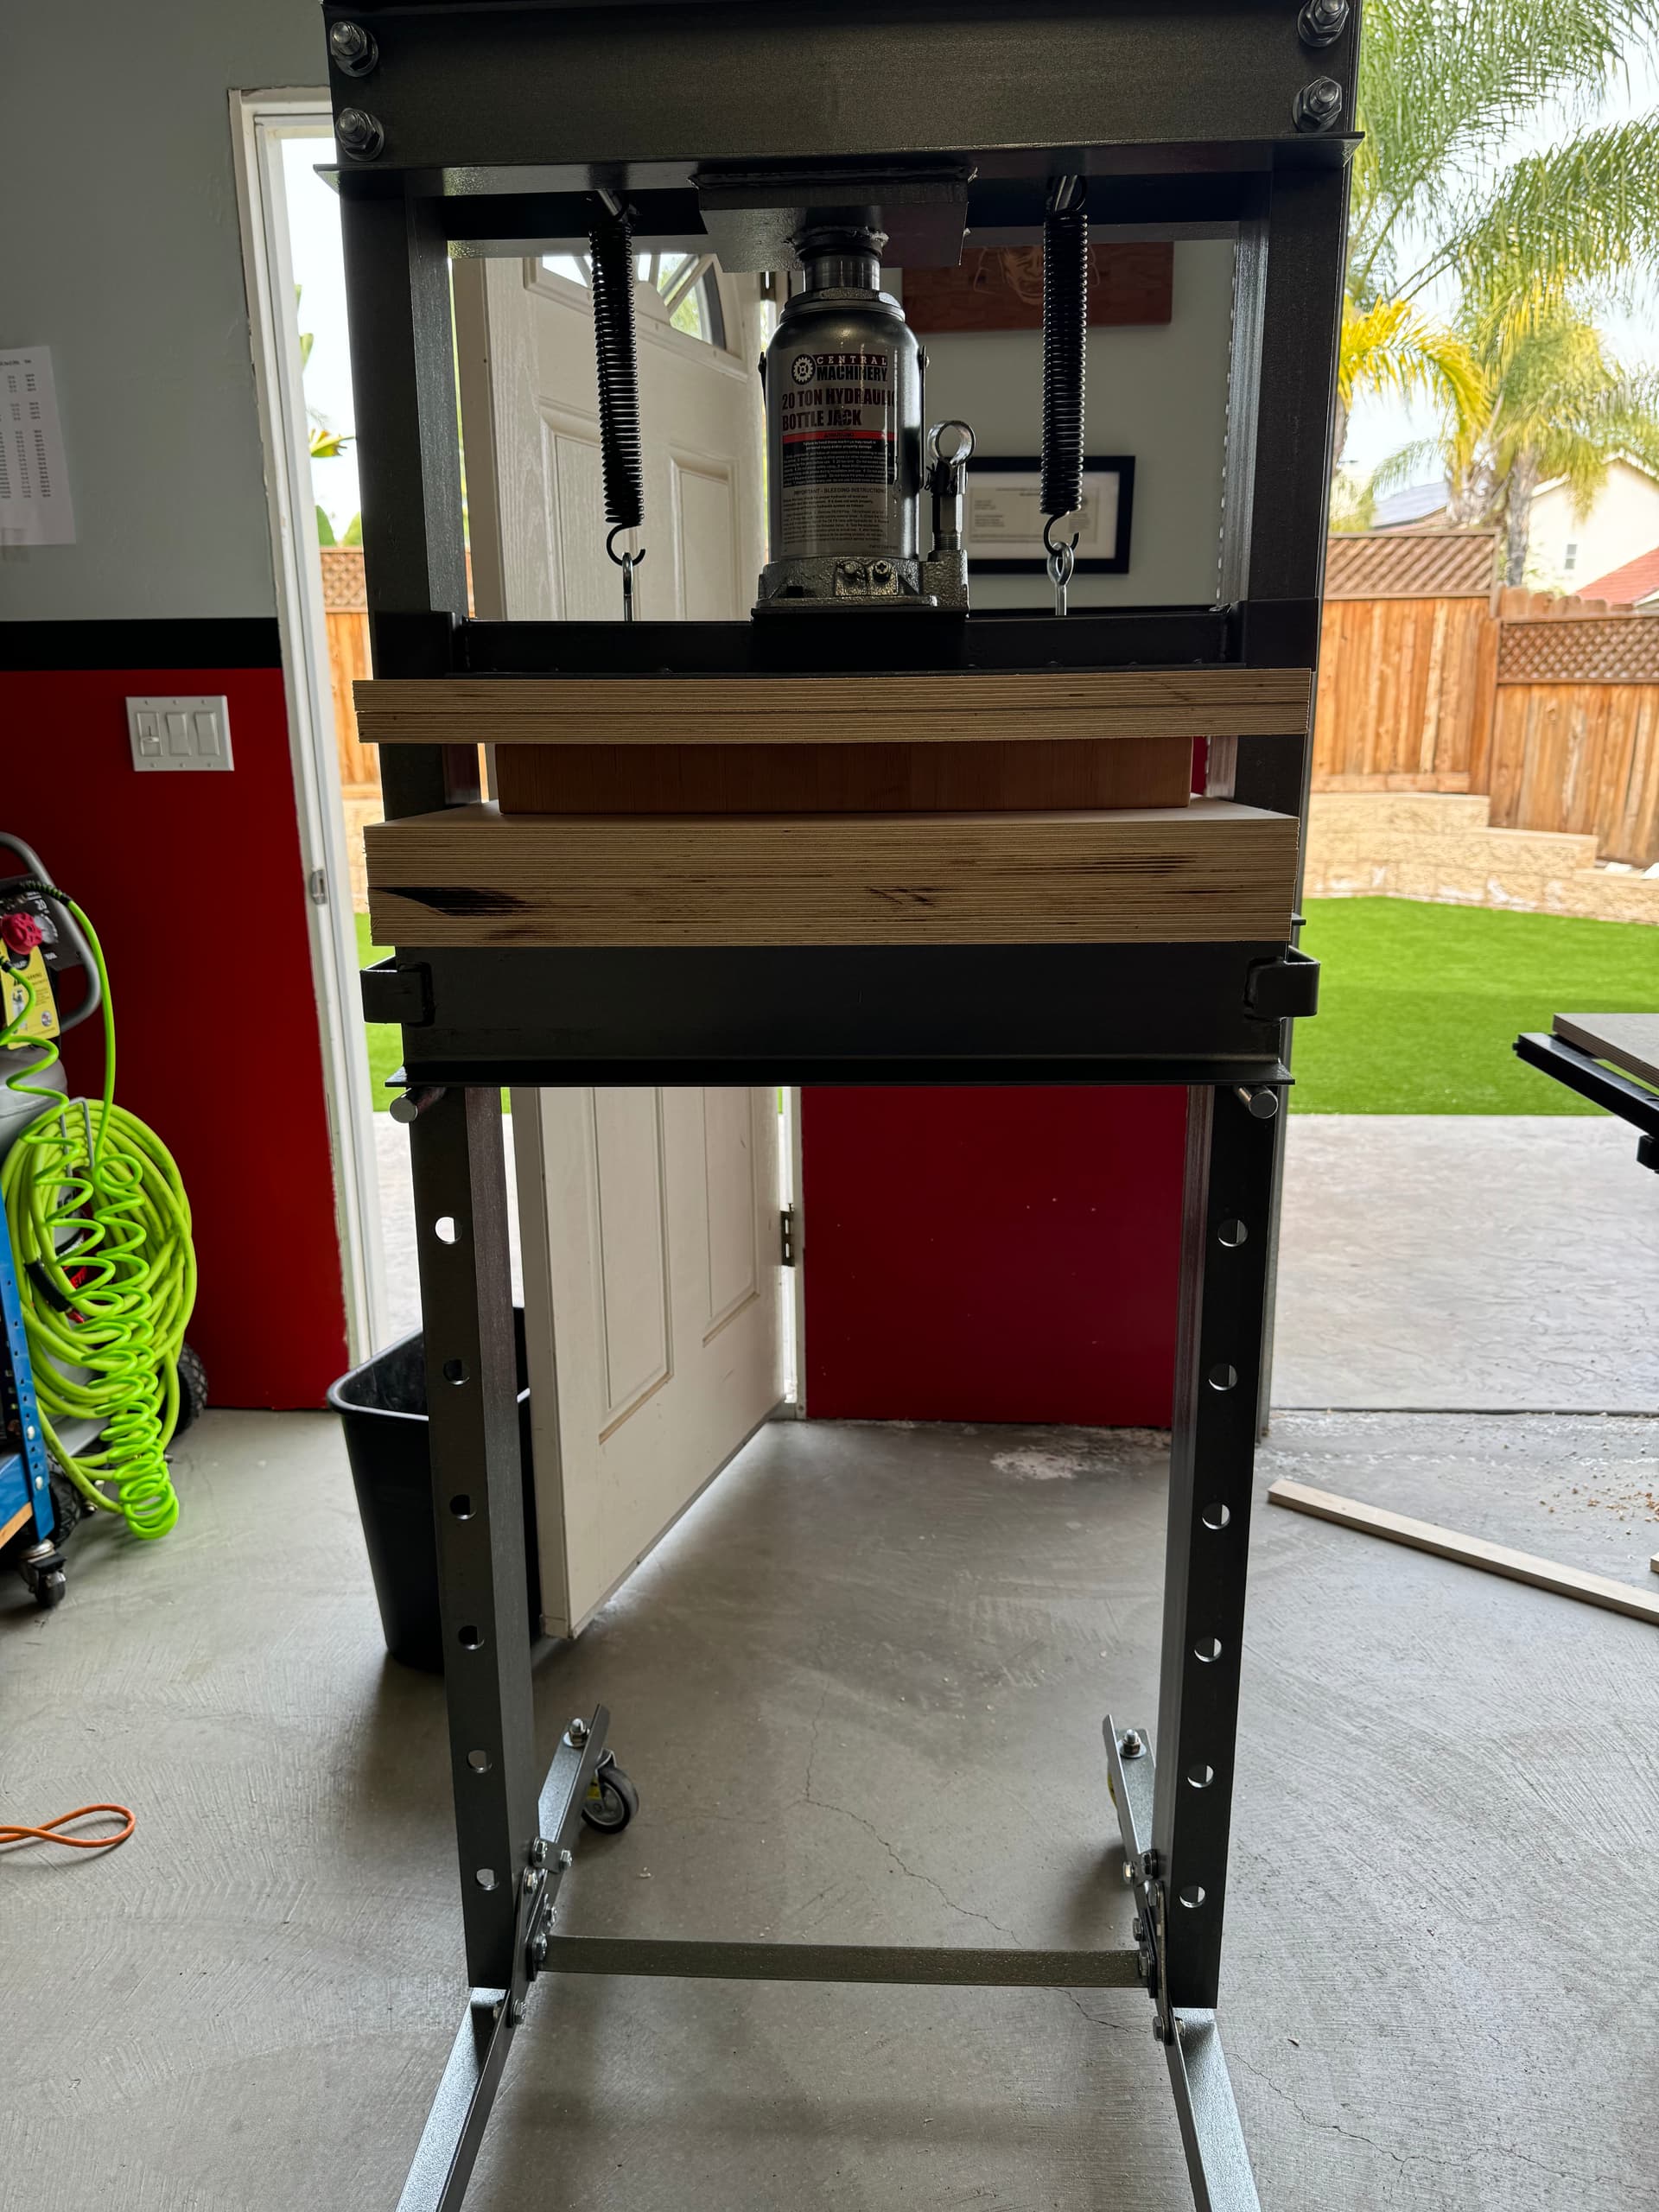
I bought a cheap press from Harbor Freight and mounted some baltic birch plywood to give me some extra surface. The bottom pieces are not screwed to each other so I can add or remove them depending on the thickness of the project. I had tried using every avail clamp in the shop but never got the pressure it needs to secure the wood plug. This has worked great so far.
Thanks. Love your channel and have learned a lot from your videos. Just installed the 45w laser and that is next up to learn how to use it and see what else I can make. Keep up the great videos….Rick
Look up NWT (Norton White Tile method). You spray paint it with any kind of spray paint that has like 15% or more TiO2, and then blast it with the laser, then wash off the paint with acetone. The laser fuses the TiO2 to the ceramic permanently. This one was done with my old 15W laser.
RickP - I’m curious as to exactly which bit you are using for these? Do you prefer to do the clearance first, or the v-carve? What bit are you using for the clearance? And how deep is the inlay? Just collecting some details on what people are doing!
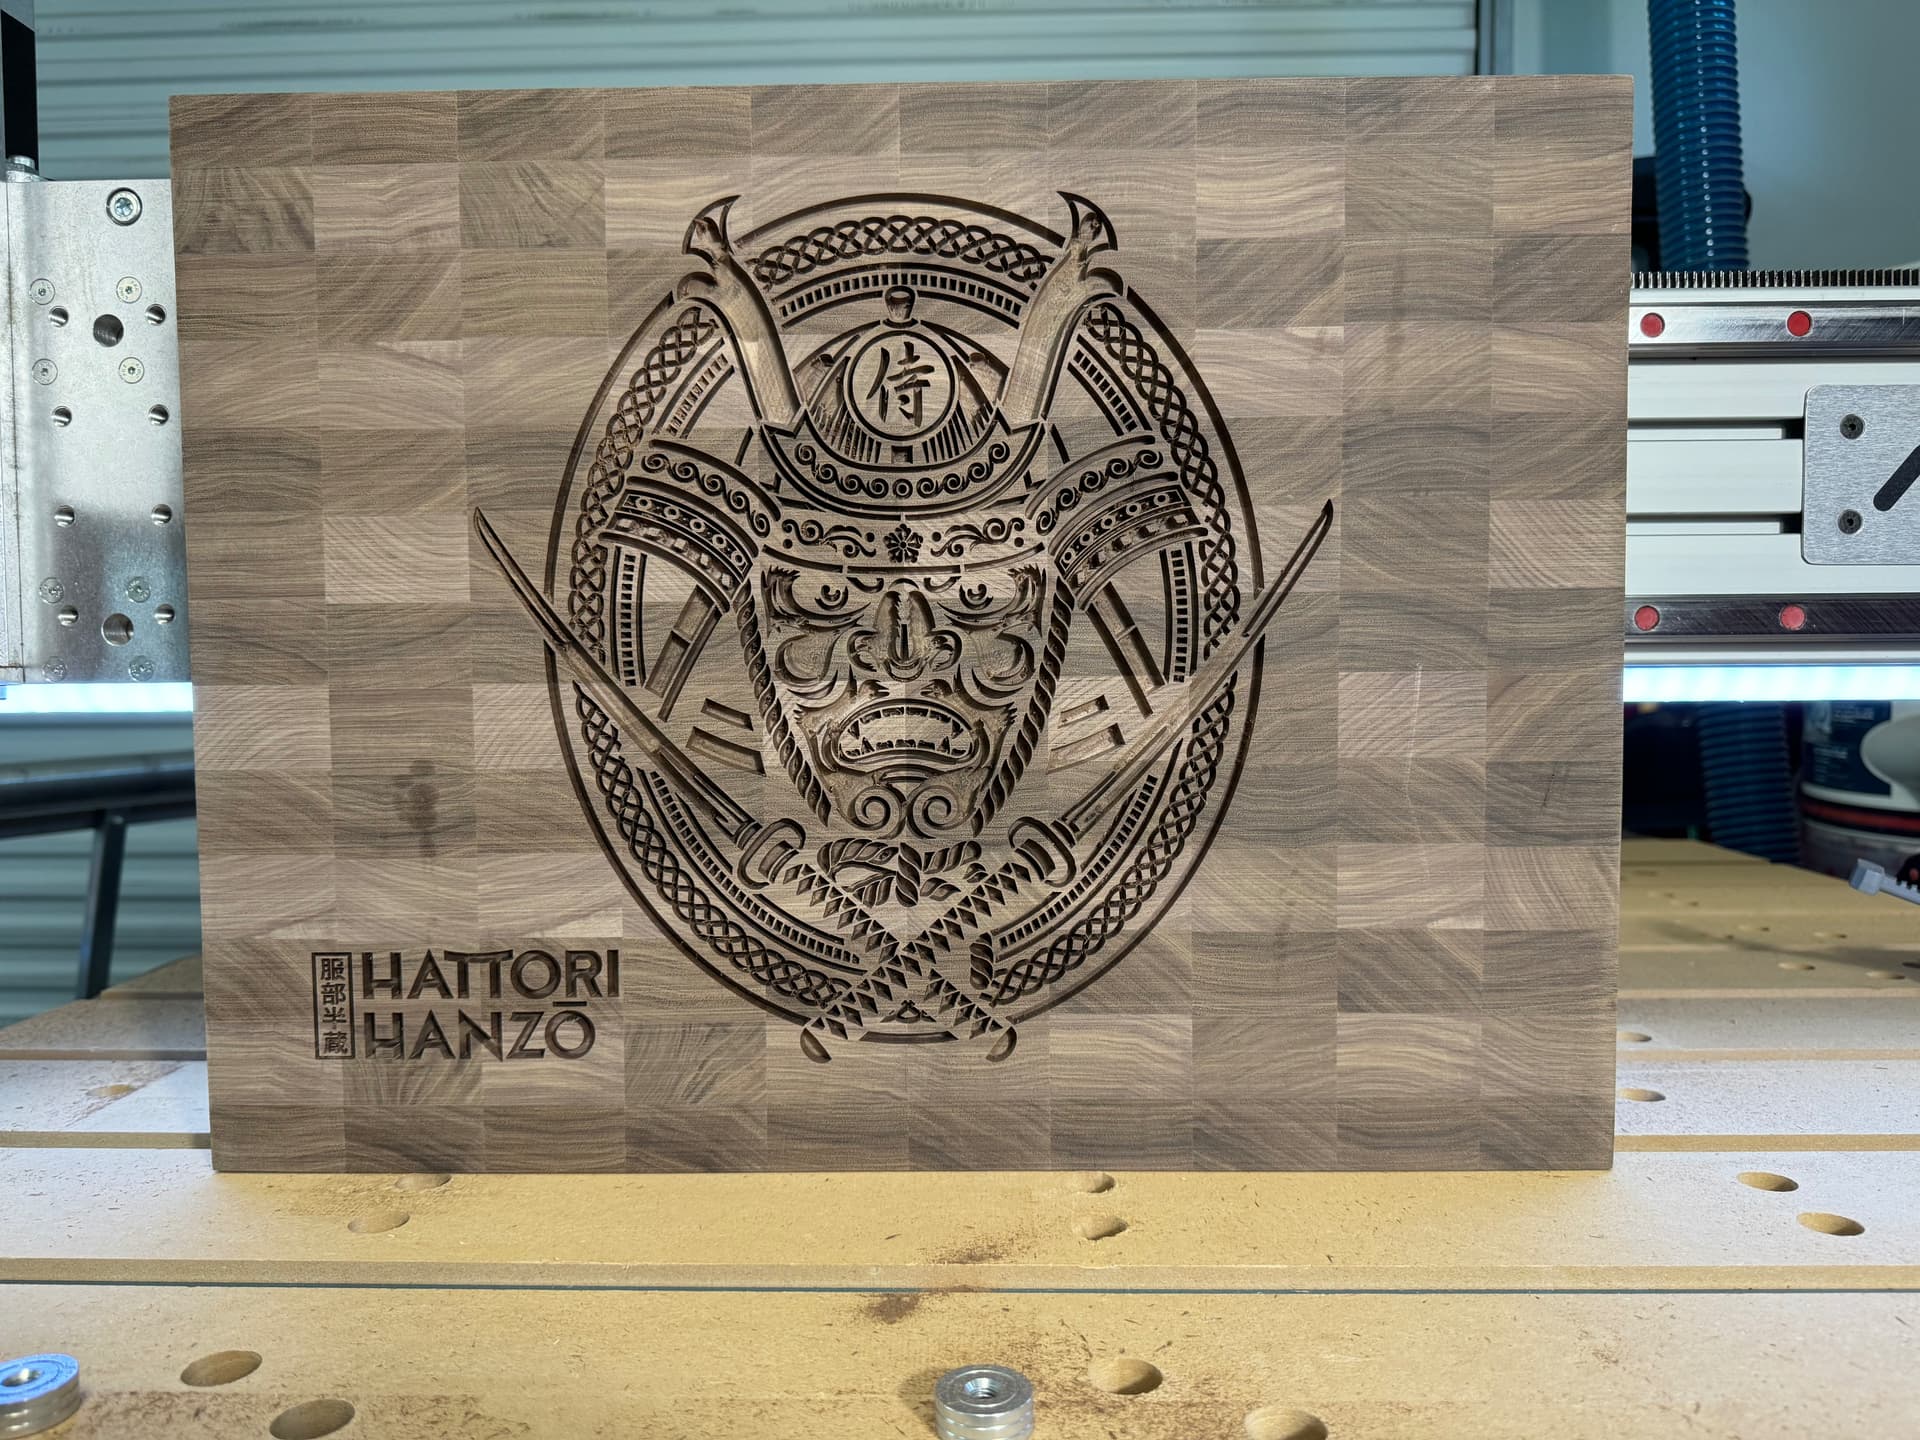
I only used two bits for the carving portion. I used an Amana 1/8” downcut end mill (#46200) and the Amana #46470 6.2 Deg Tapered Ball Nose bit. This is a 6mm bit so I had to buy a 6mm collet for it. I also used a 1/4” end mill to do the wood removal of the plugs to surface the board down between glue ups. This was only because my bandsaw isn’t big enough to run that size board through to cut off the excess. I could have probably used a half inch bit but I was worried about chipping if I took too much off too fast.
As for the settings. I pretty much used the BroInWood method and he uses the metric system so I went with that on this build. All female carves were done with the VCarve toolpath and set to a flat depth of 6mm. For the 1/8” bit I set the RPM to 18000, feed rate to 40ipm and plunge to 20ipm. The 6.2 deg bit was set to 12000 RPM, feed rate to 20ipm and plunge to 40ipm. All the carving was done in a single pass to the 6mm depth.
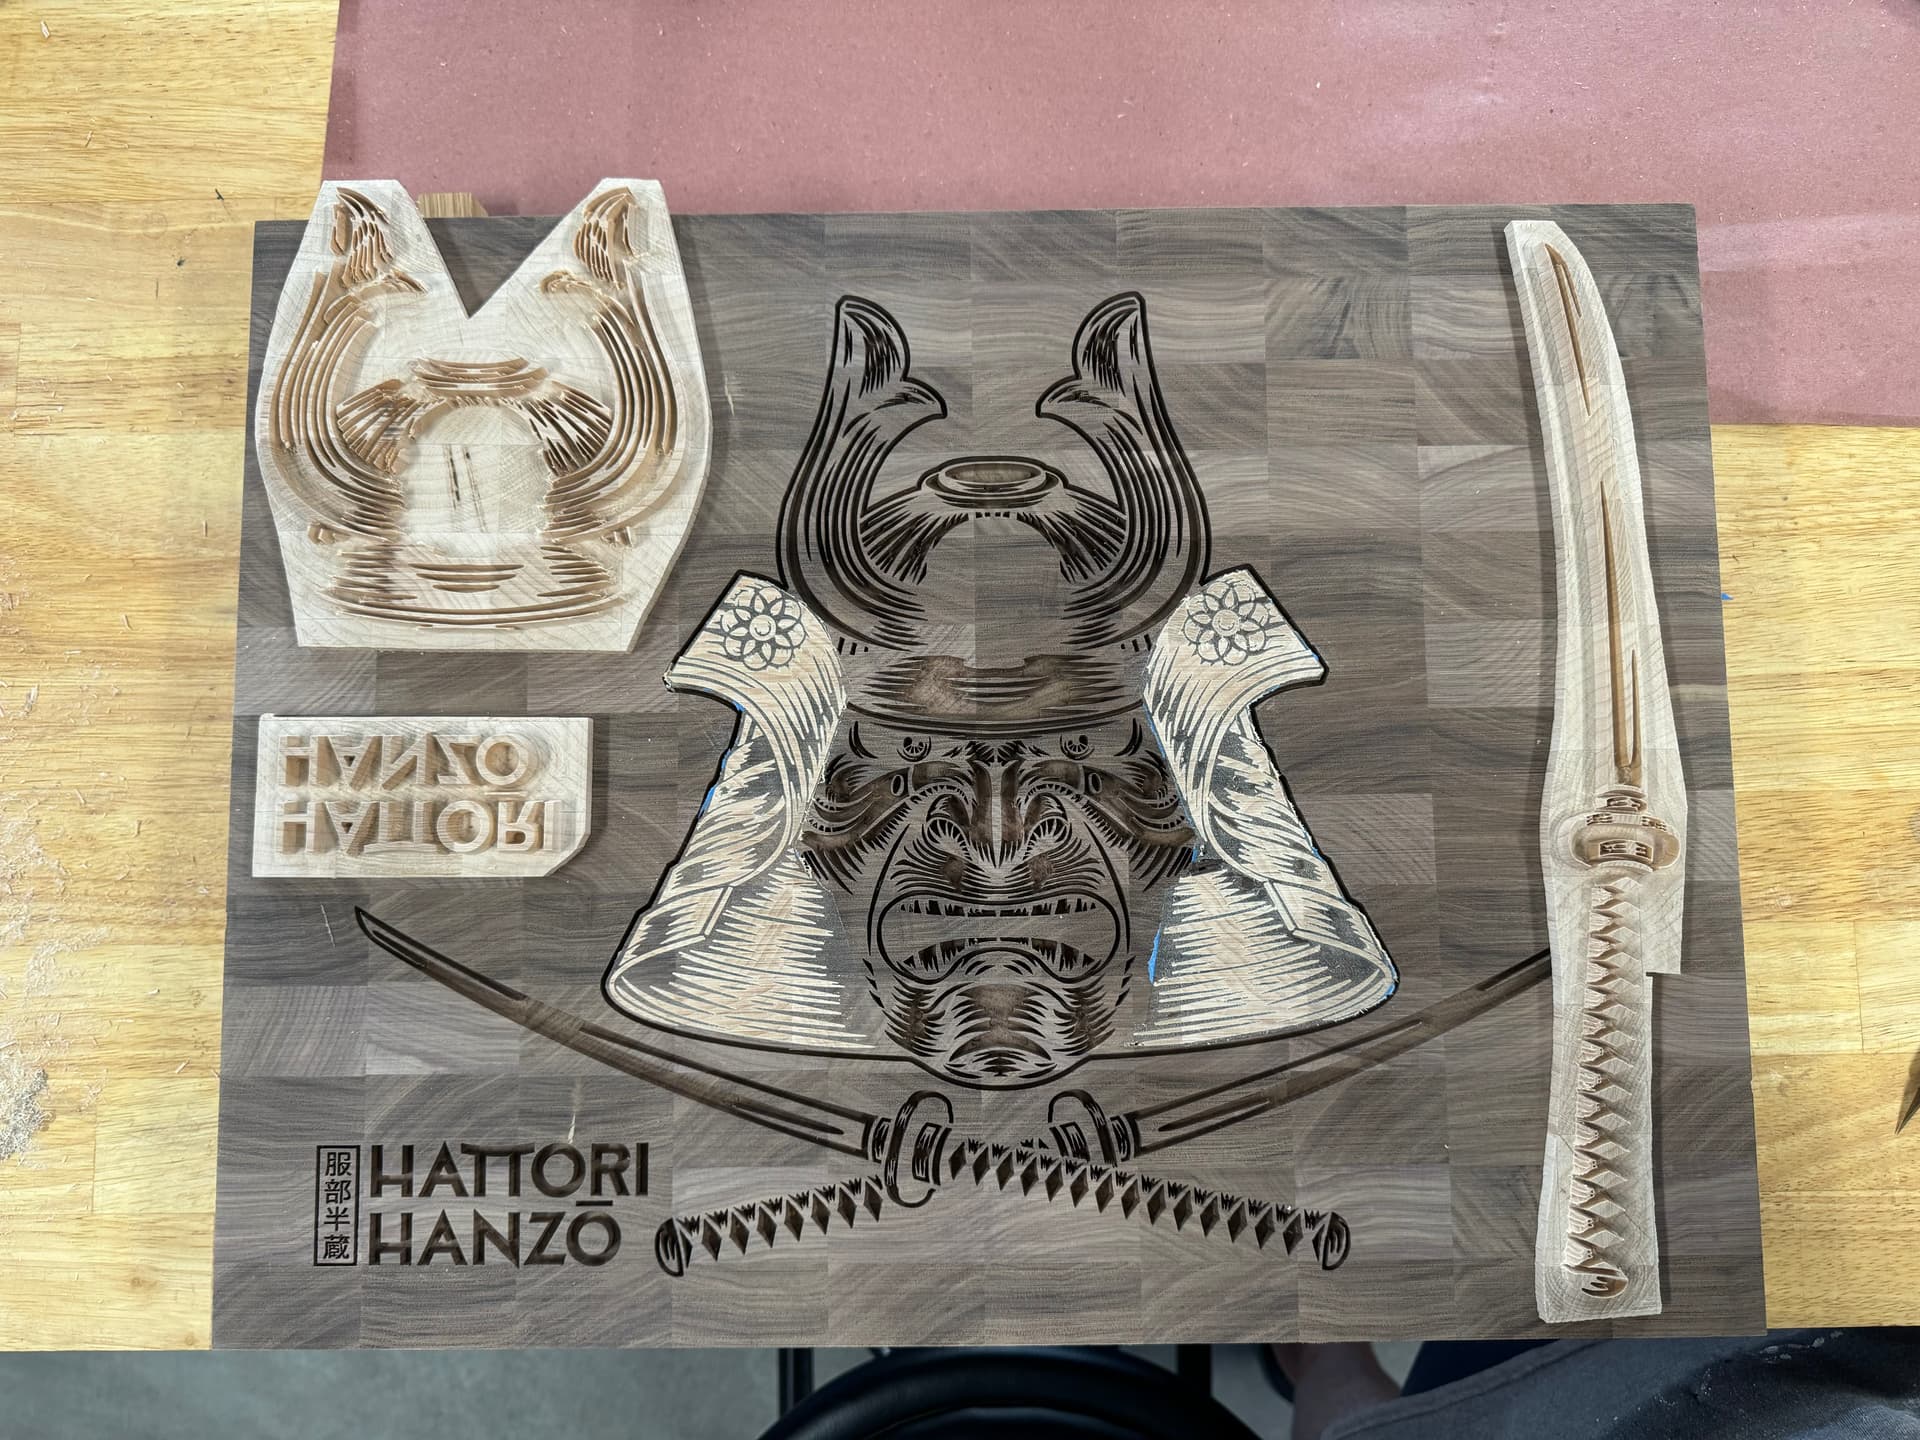
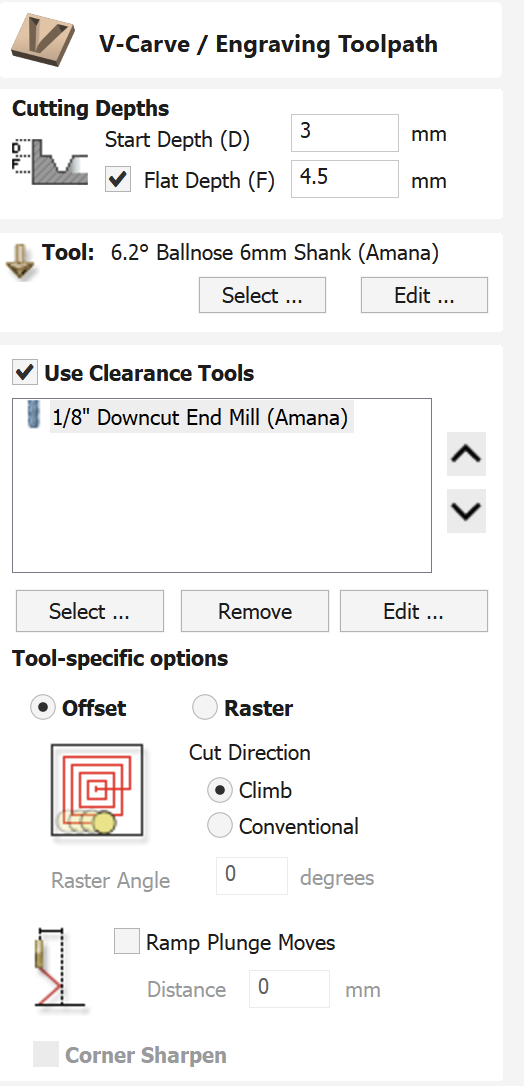
As for the male plugs, use the exact same bits and speed and feed settings. I went with the start depth of 3mm and flat depth of 4.5mm. That gave me the space for the glue gap. I did try various tweaks to those settings on sample pieces and then cut them in half on the bandsaw to make sure the fit was right and these settings are what worked for me.
Those were all the settings I used. Now, having said all that. I recently did another board with the same bits and settings with my new EX controller. On the text of the persons name I inlayed in the board, I did not get the exact same results and had several very small gaps around the text. I noticed it was not as snug as it should be going in but I thought the clamping pressure would solve that but I was wrong. My fault and I should have done a test piece since I upgraded the equipment. Not sure if it was the VCarve smoothing setting or why it was like that but it’s a good lesson to do a practice piece and tweak the start and flat depths a tad if needed. One thing to note if you do that. I always try to make the combined start and flat depth 7.5mm so whatever variation you use would equal 7.5. I know there are plenty of videos and other settings out there that are different but this is what worked for me and my AVID. Hope this helps…Rick
Thanks Rick, this is super helpful! I’ve done a handful of detailed inlays with VCarve, but I’m working on a plugin for Autodesk Fusion. I want to make sure I get a few more bits that people use, and try similar settings. I also haven’t done a big cutting board inlay yet.
Regarding gaps with the EX controller. I encountered the same thing with my stepper motors and the EX controller. My problem was the “smoothing” settings for VCarve were still too jerky. I turned smoothing entirely off, and this caused the machine to use the default slow acceleration, which (with my stepper motors) , caused a lot smoother action and less breakage. Maybe give that a try and see if it helps! (and let me know if it does).
I tried hard to develop a better smoothing setting, but couldn’t get it to work. I discussed this on the Centroid forum a bit:
I do need testers! I’m pretty sure it is ready. It can create curved inlays; both the female pocket and male plug, and setup proper toolpaths for machining them; including the “adjustment” parameter that one will have to tweak to get things to fit tight. It took me a long time to work out the best way to do curved inlays.
It’s in Python…for better or worse. Python is quick to program, but easy to make mistakes in. C++ is a little too verbose for programming, and harder to quickly iterate and debug.
Send me your email and I’ll send it to you later today.
Here is my tool settings for those two tools. I forgot to add to my last post that I always do the clearing pass first and then the vbit. I had seen people online say that if you do the vbit first then sometimes the end mill might chip away part of the vcarve. Although I have not experienced that it seemed logical. This board was obviously very detailed but I have used .25” end mills as clearance bits before as well when they will fit and that makes for a much faster carve. Let me know if you have any other questions and thanks for the tip on the smoothing settings. I am still getting used to the new CNC software so I just need to make time to try all those settings on some spare wood and see what works best…Rick